Using VoiceMeeter MacroButtons to mute and unmute audio sources in OBS
This post assumes you have already followed the initial setup steps covered in the routing audio with VoiceMeeter Potato, Discord, and VectorAudio post and then set up MacroButtons for auto-ducking.
Auto-ducking is great, but what if you also want to stream the audio via OBS and mute accordingly? In my case I stream both my position’s radio communications (typically tower) as well as other controllers on above or below me (typically ground or departure). I want to mute the other positions whenever there’s radio traffic on my frequency.
Here’s how to do it.
Step 1: Add the audio sources to OBS
In the sources pane click the + button and select Audio Input Capture. Name the input VATSIM – Primary and set the device to Voicemeeter out B1 (VB-Audio Voicemeeter VAIO).
Create a second Audio Input Capture source, name it VATSIM – Secondary and set the device to Voicemeeter out B2 (VB-Audio Voicemeeter VAIO).
Step 2: Route the VATSIM audio in VoiceMeeter
In VoiceMeeter click the B1 button for the VATSIM – Primary input and the B2 button for the VATSIM – Secondary input. This will route input 3 to B1 and input 4 to B2 in addition to sending those inputs to your headset.
VoiceMeeter should look like this:
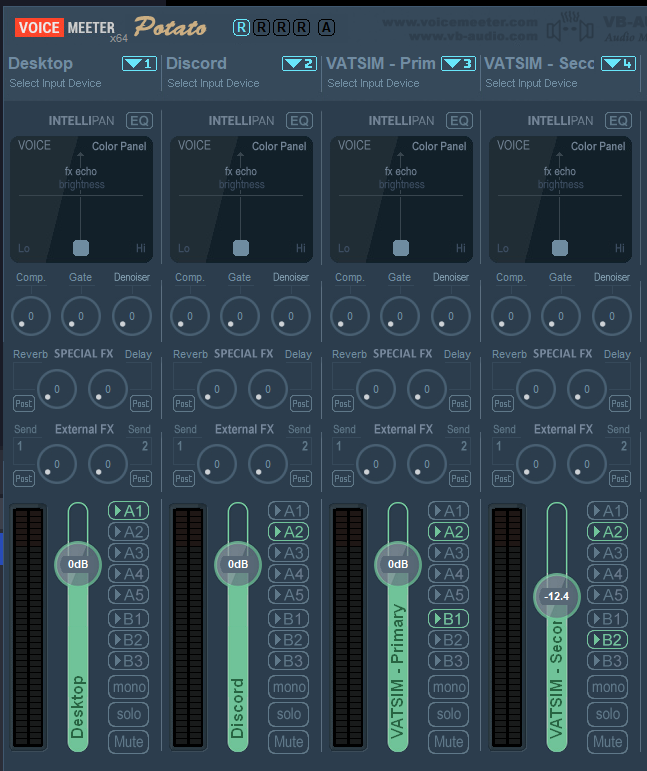
At this point you can test and make sure that audio from VectorAudio flows out to your stream.
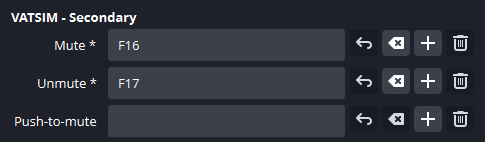
Step 3: Add mute and unmute hotkeys in OBS for the VATSIM – Secondary source
Click Settings and go to the Hotkeys tab. Use the filter box to filter for mute, then scroll until you find the fields for VATSIM – Secondary. Assign a hotkey for Mute and Unmute. (As tempting as it is to use Push-to-mute I never could get that to work).
When you’re done it should look like this:
If you are using extended function keys (F13 and higher) it is a giant pain to actually get OBS to know about them since you have to actually press the key. I worked around this by mapping a button on my StreamDeck to send the function key using the Super Macro Keystroke PTT command.
Step 4: Update the MacroButtons to send the mute and unmute keys
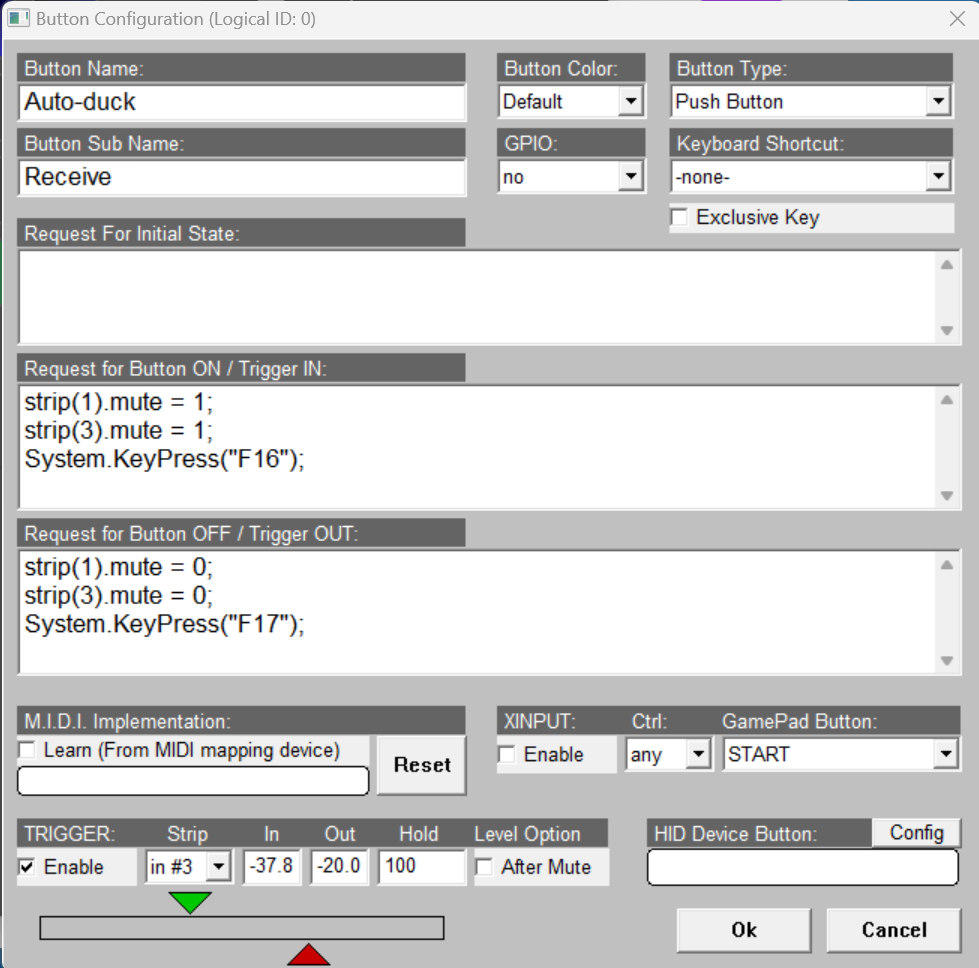
Right click on the Auto-duck – receive button in the VoiceMeeter macro button app. Add the script commands to send your mute key on trigger in and unmute key on trigger out:
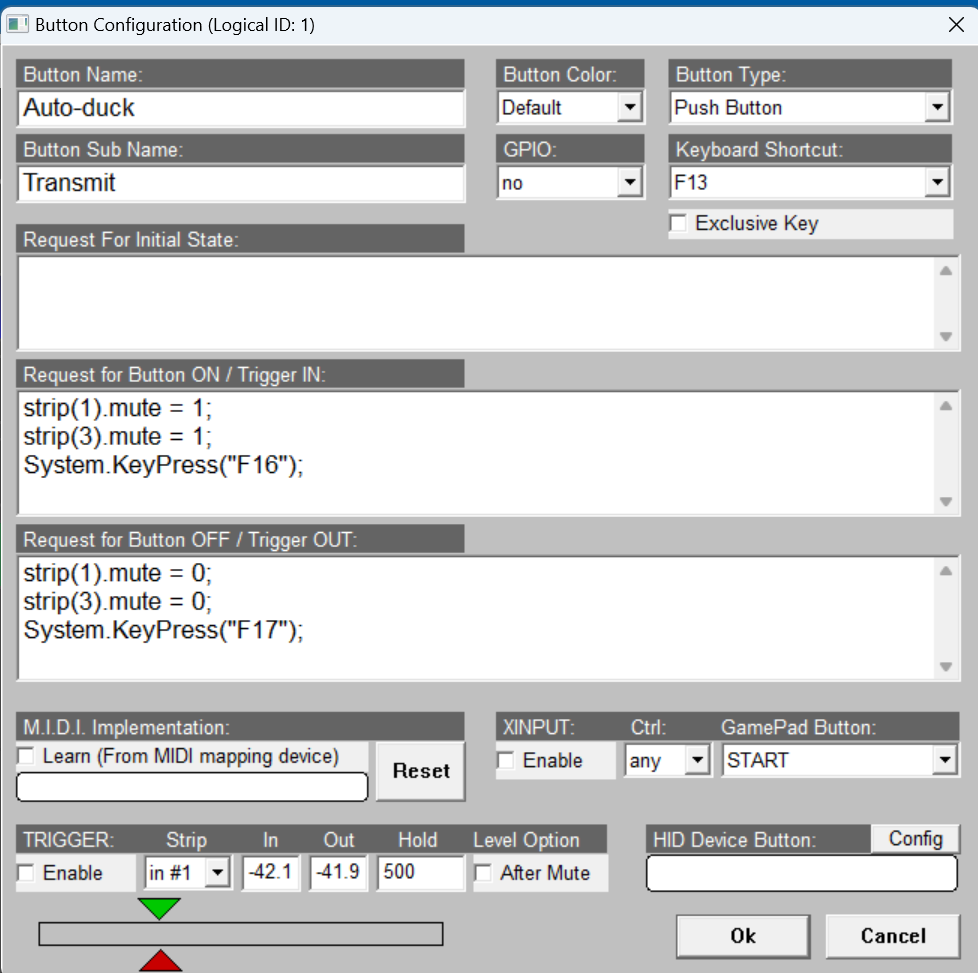
Then right click on the Auto-duck – transmit button and add the same script commands:
Other variations
While this specifically shows auto-muting the VATSIM – Secondary source in OBSyou could do any number of other things in OBS, provided there’s a mappable hotkey for it. Basically just send the hotkey from VoiceMeeter MacroButtons and then trigger whatever action you want in OBS. Nice!