Routing audio with VoiceMeeter Potato, Discord, and TrackAudio
With VoiceMeeter Potato and TrackAudio it is possible to route Discord, VATSIM audio, and desktop audio independently and control each app’s audio via macros. It’s a powerful way to do things like auto-mute Discord when VATSIM audio happens, listen to multiple VATSIM frequencies at once but auto-duck frequencies when the one you’re controlling has audio traffic, route some audio to your headset and other audio to your PC speakers, etc.
Here’s how to get the basics set up. After this setup is complete check out how to auto-duck using VoiceMeeter MacroButtons and how to mute and unmute OBS sources with VoiceMeeter MacroButtons.
Step 1: Install and license VoiceMeeter Potato and the VAIO Extension
Grab the latest version of VoiceMeeter Potato, install it, then reboot your computer. Rebooting is really important. Don’t skip that step.
After rebooting, license the VAIO Extension by going to Menu > VAIO License Extension… and following the license flow. You must license the VAIO Extension to get access to make this work. It’s totally worth it. Help support amazing software by giving the developer some money.
Additionally go to the Menu in VoiceMeeter and enable Run on Windows Startup.
Step 2: Configure each application’s audio output
The goal is to get all the different apps to feed in to VoiceMeeter on separate inputs. Here’s a table of how everything should be mapped:
| Application | Output device |
| Windows | Voicemeeter In 1 (VB-Audio Voicemeeter VAIO) |
| Discord | Voicemeeter In 2 (VB-Audio Voicemeeter VAIO) |
| TrackAudio Headset Device | Voicemeeter In 3 (VB-Audio Voicemeeter VAIO) |
| TrackAudio Speaker Device | Voicemeeter In 4 (VB-Audio Voicemeeter VAIO) |
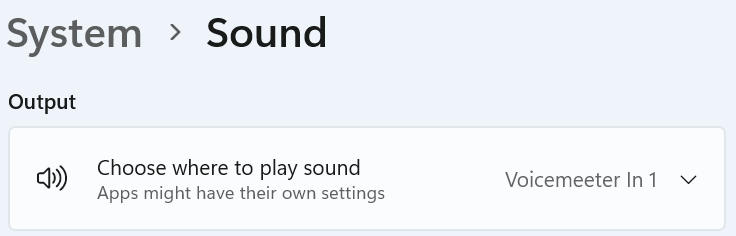
Here’s what it looks like in Windows:
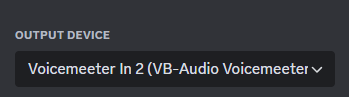
Here’s what it looks like in Discord:
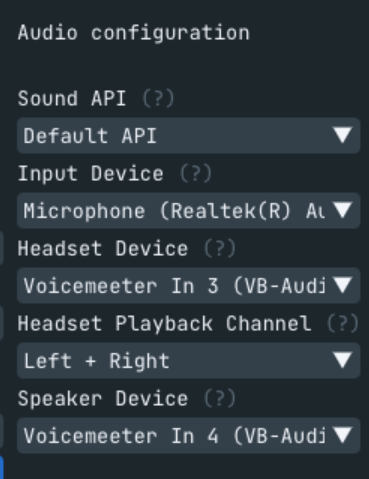
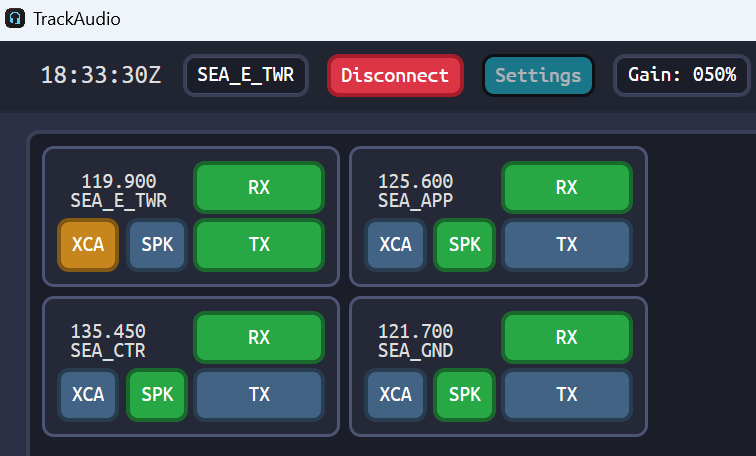
And here’s what TrackAudio should look like:
Step 3: Enable and name virtual inputs in VoiceMeeter
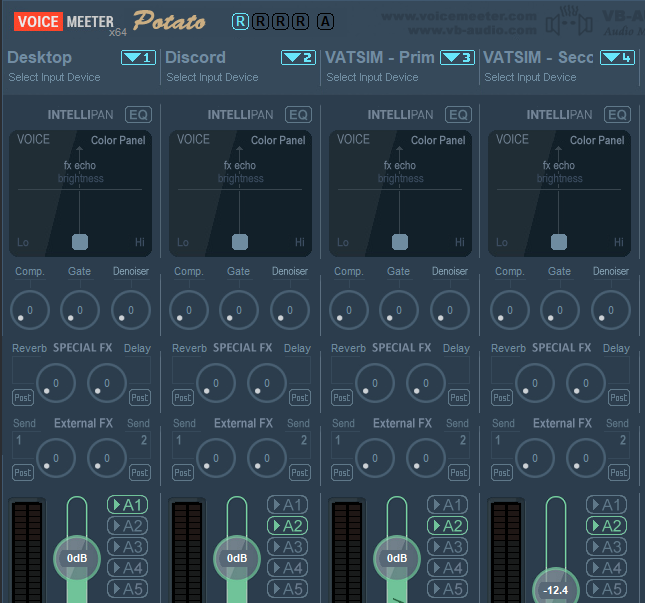
Run VoiceMeeter Potato and click the little down arrows next to each of the first four input devices in the left section of the screen. Then right click on the Stereo Input label for the first four input channels and rename them to match the sources mapped to those inputs:
| Input | Name |
| Input 1 | Desktop |
| Input 2 | Discord |
| Input 3 | VATSIM – Primary |
| Input 4 | VATSIM – Secondary |
When you are done the input section of VoiceMeeter should look like this:
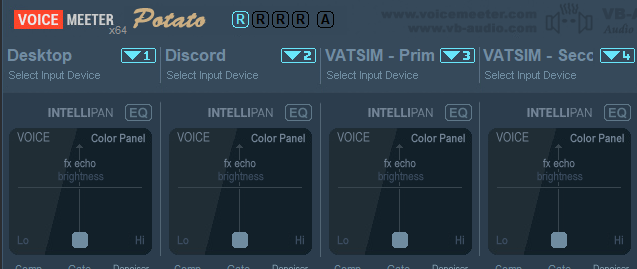
If you don’t have the little arrows at the top of each input device it means you didn’t license the VAIO Extension as mentioned in step 1.
Step 4: Configure VoiceMeeter outputs
This is where you tell VoiceMeeter to actually output the audio it receives. In my case I have two outputs: my PC speakers and my headset.
In the top right of the VoiceMeeter window select the A1 button and pick your speakers from the WDM (WASAPI) section. Then select the A2 button and pick your headphones from the WDM (WASAPI) section.
If you don’t see separate speaker and headphone devices you may need to run the Realtek audio manager app to set the option that splits the speaker and headphones into two separate devices.
Step 5: Route the audio
At this point you have four different audio inputs and two different audio outputs. The inputs can now easily be routed to the audio output you want by selecting the appropriate output button under each input. In my case I have the desktop audio routed to A1 (speakers) and all the other audio routed to A2 (headphones):
You can use any of the volume or EQ controls to independently modify the audio from each of the input sources. For example, you could put the VATSIM audio entirely in your right ear and the Discord audio in your left ear… but auto-ducking is better, and how to do that will be in the next blog post.
Step 6: Tell TrackAudio where to send each frequency’s audio
By default, every RX frequency you add in TrackAudio will route to your primary output. To route frequencies to the secondary output you need to click the SPK button on the frequency after you have activated RX. Here’s an example showing SEA_TWR routed to the primary output with SEA_CTR, SEA_APP and SEA_GND routed to the secondary output:
Leave a Reply