Recording a timelapse with OBS and Adobe Media Encoder
I wanted to record a timelapse of a long streaming session (four hours long) but didn’t want to record four hours of video to my drive just to throw out a ton of the frames. After a bit of digging I found a post in the OBS forums that gave me a head start on figuring this out. Here’s how I did it.
Step 1: Configure OBS video settings
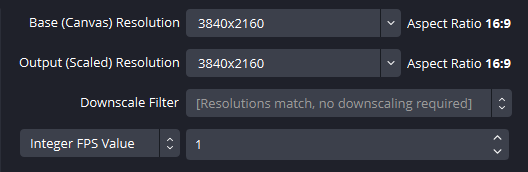
In Settings > Video configure the output resolution as you want, then set the framerate to Integer FPS Value and the number of frames you want to capture per second. In my case I did 1. If you want even slower than that you can use the Fractional FPS Value setting.
In Settings > Output > Recording set up your output file options as you want. In my case I simply switched to MPEG-4 (.mp4) as the recording format. I left everything else the same.
Step 2: Stream and record
This is the easy part. Do your stream and record the video. Don’t forget to hit Start Recording in OBS or you’ll be really sad after!
When you’re done and hit Stop Recording be patient. It can take a minute or so for the recording to stop.
Step 3: Re-encode in Adobe Media Encoder
Since we recorded at 1fps the video file seems to be as long as the entire stream. Instead we want it to be 60 fps with all the existing frames used, no interpolation.
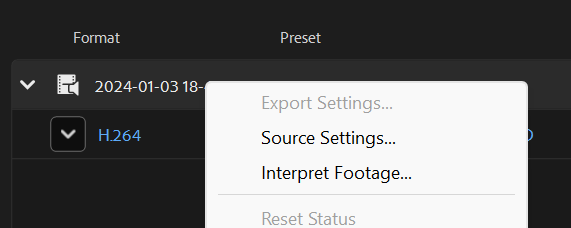
Adobe Media Encoder can do this. Load the recorded file in to Adobe Media Encoder, right click on it, and select Interpret Footage…. Make sure you right click on the video, not on the encoder settings beneath it.
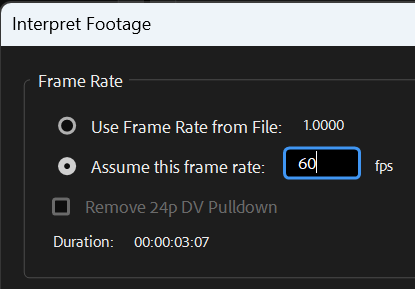
In the resulting dialog select Assume this frame rate and then enter your desired frame rate (in my case 60fps).
Hit OK then apply whatever output encoding format you want and export. Voila! Your video just became seconds instead of minutes.
Leave a Reply