Replacing the bad thermal paste on an XFX Speedster MERC310 AMD Radeon RX 7900XT
I bought an XFX Speedster MERC310 AMD Radeon RX 7900XT for my new PC to use with Microsoft Flight Simulator 2020. Every time I ran MSFS2020 the card fans would spin up to max speed and sound like a jet plane taking off.
I did some research and found out that basically every one of these cards shipped with bad thermal paste causing abnormally high temperatures. In my case the temps looked like this in AMD Adrenaline when I was sitting parked at a gate:
- Fan speed: 2324
- GPU temperature: 63C
- GPU hotspot temperature: 94C
Apparently, a delta that large between GPU and GPU hotspot is very wrong, and a hotspot temp that occasionally touched 100C is also very wrong.
Here’s how to fix it by applying a sheet of PTM7950.
Step 0: Open a support ticket with XFX
They need to understand how prevalent this issue is. Open a support ticket with them. Include your GPU temps. They will reply back and say you have two options: RMA the card or replace the paste yourself. If you are in the US you can replace the paste yourself without voiding your warranty.
If you choose to RMA the card then stop here. If you want to replace your paste keep reading.
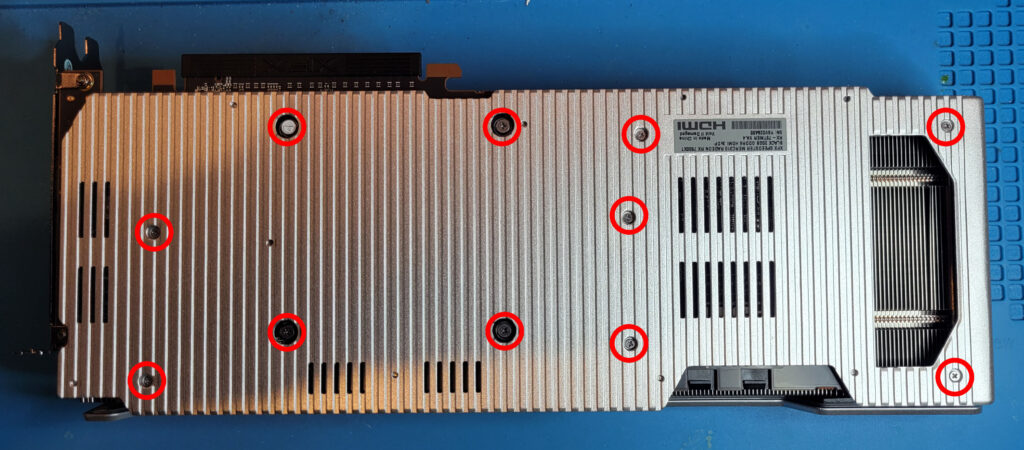
Step 1: Unscrew all the screws
There are 11 screws to remove. Remove them.
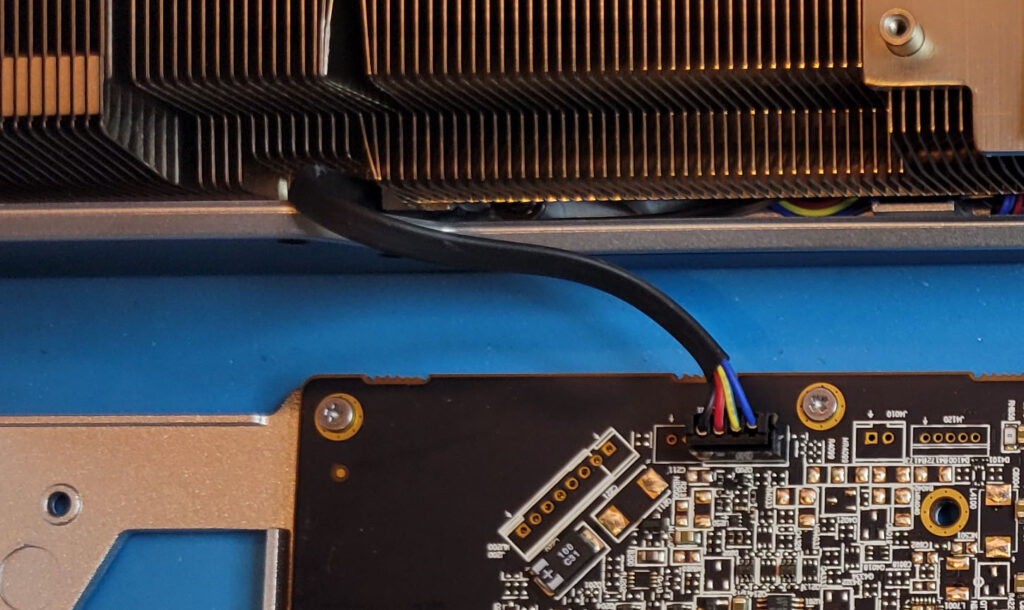
Step 2: Pull the card apart
This was kinda scary to be honest. It takes a bit of force to pull the card apart because it’s stuck together with the old thermal paste and some thermal pads. Pull and it will come apart. Be careful not to damage the cable connecting the heatsink/fans to the circuit board.
Some of the thermal pads on the VRAM and VRMs will probably rip. There’s nothing you can do about it.
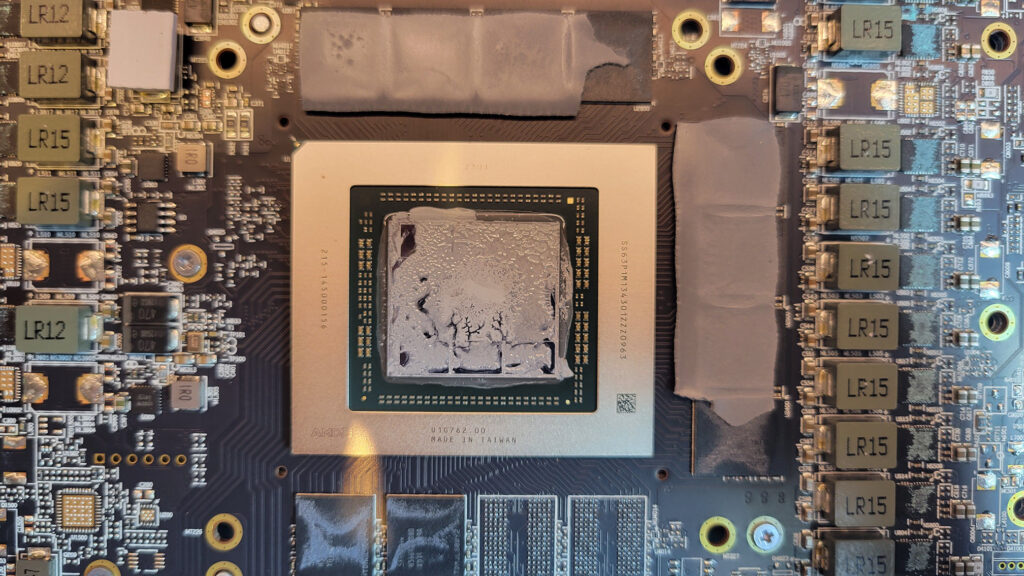
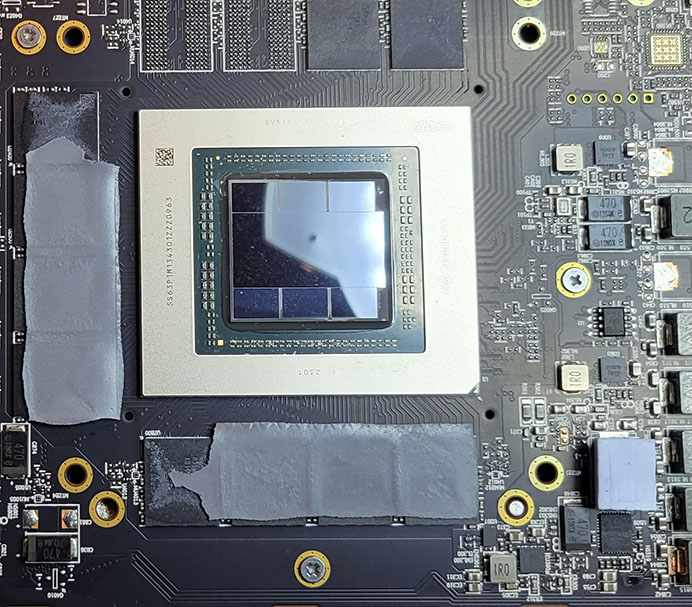
This is what the GPU looks like after pulling apart the card. Note some of the thermal pads ripped.
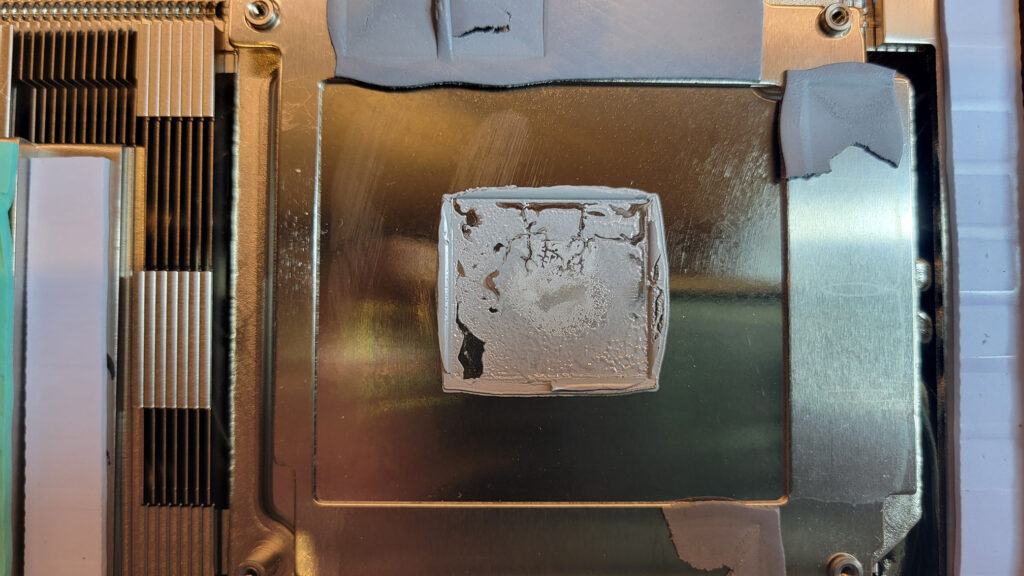
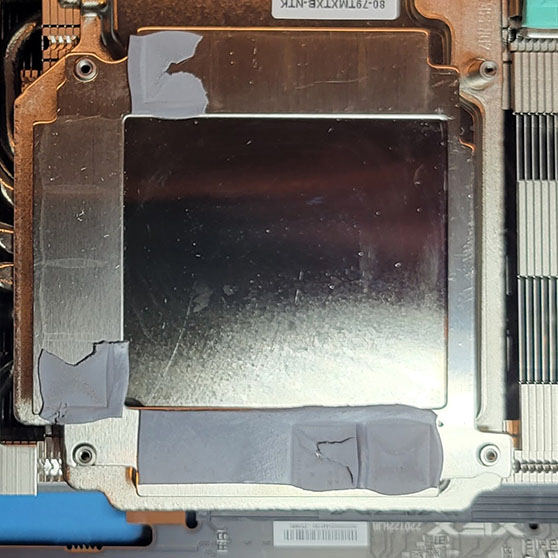
This is what the heatsink looks like after pulling apart the card:
Step 3: Remove the old thermal paste
You only need to remove the thermal paste from the GPU and heat sink. Don’t do anything with the thermal pads, leave them alone. I used 99% isopropyl alcohol, some Q-tips, and some lint free towels, to clean things up as best I could. Here’s what it looks like after:
Step 4: Apply the PTM7950 to the GPU
I put the finger cots that came in the kit on then used some scissors to cut a piece of the PTM7950 to slightly larger than the GPU. With a pair of small tweezers I peeled back the protective film from one side of the pad then stuck it on the GPU. With the included brush I made sure the pad was evenly adhered to the GPU.
After that I used the tweezers to pull up the top piece of protective film. This was the result:

Step 5: Put it back together
Put the heatsink/fan back on top of the board aligning it as best you can. Then screw in the seven small screws to hold things together.
Finally screw in the four larger screws with springs to firmly connect the heatsink to the GPU. XFX recommends doing this in a cross pattern, top-left/bottom-right/top-right/bottom-left, a quarter to a half turn per screw, to ensure even pressure is applied.
Step 6: Enjoy
That’s it. Put the card back in your PC, fire it up, and watch your temps magically be fixed. In my case the new temps when parked at an airport in MSFS2020 were:
- GPU temperature: 64C
- GPU hotspot temperature: 78C
With the Quiet curve applied in AMD Adrenaline the card is pretty much always quiet when flying now.
If you decide to do this yourself keep in mind that I’m not an expert. Until this card I’d never once replaced the thermal paste on a card before.
Leave a Reply