After reading so much about Dan Berg’s experiments coating and printing metal on the Luminous Landscape Printing forums I figured I had to give it a try. After many back and forth messages with Dan I was ready to take the plunge.
The Metal
The metal is 0.025” 5025 aluminum from Metal Supermarkets. I had a painful time finding a local source as none of the roofing supply companies had any. Metal Supermarkets came to the rescue again (I used them for the galvanized metal that makes up my print viewing board). I had them cut me four 12×12” and four 12×18” pieces out of a 4×10′ sheet that was relatively clean of scratches.
The Cleaning
Oh man. The cleaning. I tried all sorts of ways to clean the metal to find what would be the fastest way.
The dishwasher: This did NOT work. I tried one sheet of each size and while the bottom 3/4 of each sheet came out clean the top edges where they touched during washing was all discoloured. No amount of scrubbing would get rid of it.
Metal polish: This kinda sorta worked. It really makes the aluminum go black until you buff it really hard. Not worth the effort
Bon Ami and water: This cleaned reasonably well.
Rubbing alcohol: This also cleaned reasonably well.
Next time around I will do the steps on the InkAid site: using dishwasher powder like Cascade and then following up with rubbing alcohol.
I also tried buffing the aluminum with 0000 steel wool. It certainly buffs but it also leaves obvious fine scratches. If you want a directional pattern to the underlying aluminum this is the way to do it. If you don’t… don’t use the steel wool!
The Coating
Dan uses InkAid to coat his metal. Unfortunately they don’t have any local sales channels. I’ve got an order in for a quart but didn’t want to wait for it to show up. David mentioned Daniel Smith sells Golden Digital Grounds so I picked up a bottle of that.
My first coating attempt was with my HVLP sprayer. Complete and total failure. It just sprayed globs everywhere. I’m sure it’s possible to do (the InkAid folks list it as one of the application methods) but I didn’t have the patience to play with pressure settings and whatnot. I fell back to using an $0.86 foam brush from Home Depot. It actually coated relatively easily. One coat in a horizontal direction, followed by a second in the vertical direction once the first coat dried. Total drying time was only about an hour per coat. Not bad!
The Printing
Once I got to this point it was honestly pretty easy. I ran the print on a Canon iPF5100 using POP Board as the media type. This kicks on front loading of the media and provides a perfectly flat printing path. I had to make sure to pull the printer far enough away from the wall so the sheet could come out the back during printing.
I made a custom profile for the aluminum sheet using my Spyder2. It read the target print surprisingly well.
The hardest part of printing is getting the aluminum to load straight. There’s one tiny orange mark you’re supposed to align the edge of the sheet with and it’s very easy to be slightly off and have the printer complain about the aluminum being crooked. When I did the profile target it took me six tries to get the sheet loaded properly. I had better luck this morning with the real print: it only took three tries.
The Result
I’m quite pleased with the result considering I’ve never done this before. There are definitely some issues in the darkest areas of the print. The ink has cracked a bit on the coating and is rather splotchy in some of the very dark shadow areas. I’m not sure if there’s anything I can do about that since I can’t control the amount of ink the printer lays down. I wonder if the InkAid coating will work better.
The only thing I haven’t done at this point is apply a couple of coats of spray varnish to protect the print and add some more gloss. That’ll happen later today.
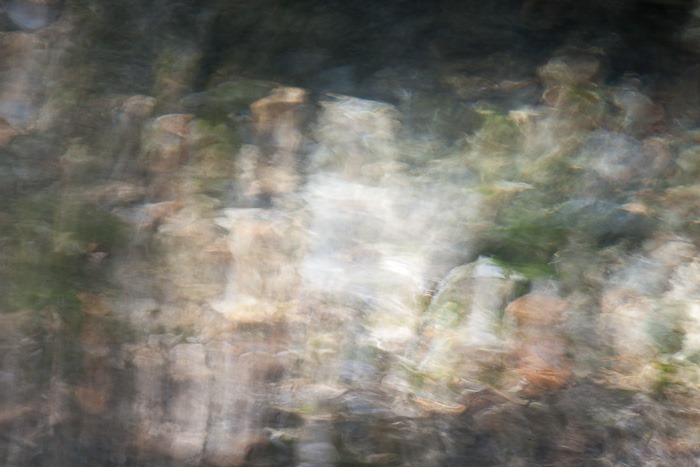
Canon 5D Mark II, 70-200 2.8 IS II @ 200mm. ISO 100, 0.8 sec. @ f/32.
Whenever I go on a photo trip I find it takes me a decent period of time to get into the groove of shooting. This is especially true when it’s been a while since I picked up the camera.
Lately I’ve been trying to jumpstart the creative process by literally messing around with the camera early in the trip. The photos I take are never meant to be anything special. I’m just shooting to try and get my head back into photography.
On the trip to Eastern Washington this weekend we stopped at Denny Creek. David, Teresa, and I did some long exposure handheld shooting. It was all about coming up with interesting patterns and textures. No stress about getting perfect composition in camera. No worries about nailing the exposure. Just carefree shooting for the fun of it.
The whole trip to Eastern Washington was hugely successful (as you’ll see in a series of upcoming blog entries). I like to think it was because we stopped for some mindless fun at a creek.
Canon 5D Mark II, Canon 70-200 2.8 IS + 1.4x extender @ 125mm. ISO 100, 1/500 sec @ f/5.6.
The above shot is from my trip to Antarctica back in January of 2009. I never planned to shoot much wildlife when I was there, and the shots I did take of penguins were halfhearted attempts just so I had a few to show people when I got back.
When we were on Petermann Island I forced myself to take a few minutes to photograph penguins. At one spot I noticed a curving glacier in the background with penguins and rocks in the foreground. I shot a few photos, and then back on the boat found the above image. I was thrilled. Between the glacier, the rocks, and the cute little penguins, I thought I had a spectacular image.
Then I showed it to Seth Resnick. His immediate comment? “Why the %(*! is that penguin sleeping?”
Sigh.
He’s right, and he taught me a valuable lesson. When you come upon an interesting composition it’s useful to just sit and wait for a while. Just because it looks nice now doesn’t mean that’s the most awesome you can capture at that location. If I had waited another 5 minutes there was a good chance the sleeping penguin would have woken up and reached his beak to the sky. Then I would have had an awesome photograph.
This doesn’t just apply to animals, by the way. If you are shooting landscapes pay close attention to the clouds. Very often a 10-15 minute wait means the difference between clouds that are just there vs. clouds that add awesome movement and energy to the image.
The lesson has stuck with me over the last year. It’s a tough one for me to apply, since my natural inclination is to “go go go” and not really stop and take in the overall scene. I’m getting better at it though!
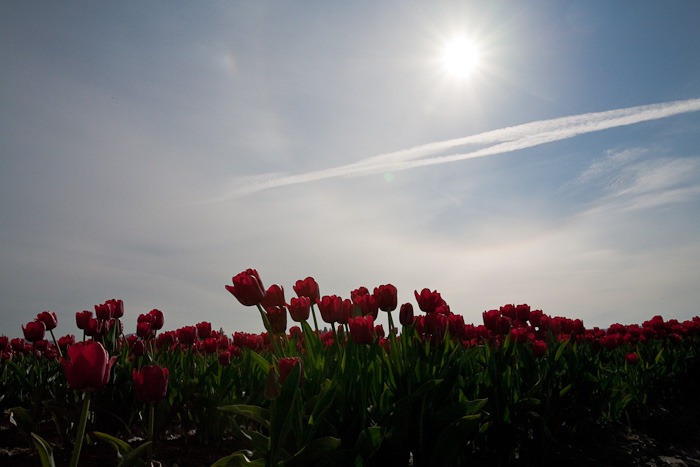
Skagit Valley Tulip Festival, 2006 Canon EOS 5D, 17-40 f/4.0L @ 25mm. ISO 640, 1/640 sec @ f/16.
Recently I had the honour and pleasure of sitting on a committee of photographers selecting images for a photo book that will help support the United Way this fall. I reviewed over 1900 images and got to see some truly awe inspiring photography. Along the way I coined a new term: “tulip shot”.
I must have seen 50 different variations of photos of tulips in the submissions. Warnings were given prior to submissions about the perils of submitting a tulip photo, but alas, they came in anyway. What’s the problem with a tulip shot? Well, it may be your best tulip shot ever, but when you submit it to a juried show or book competition, it is going head-to-head against the other50 tulip shots that were submitted. You better be darn sure that your tulip shot is the super duper awesome best ever of those 50, because chances are if a tulip shot does make it into the show/book/whatever there will only be one.
There are many other types of photos that fall into the “tulip shot” bucket. Some that come to mind are: sunsets, mountains reflected in water, flowers, bugs, cute kids, I-used-a-lensbaby-look-at-my-out-of-focus-edges-!, waterfalls, leaves, anything shot in HDR, animals in zoo cages, etc. In the Pacific Northwest some regional variations are “tulip shots” as well: Canon Beach/Ruby Beach/Rialto Beach/Second Beach, cherry blossoms, Skagit Valley Tulip Festival, and the Palouse region of Eastern Washington.
Cherry Blossoms, 2007
Canon EOS 5D, 100mm f/2.8 macro. ISO 100, 1/250 sec @ f/4.5.
If you are ever submitting to a competition and your image contains any of the above you should think long and hard about what separates your variation of that particular scene from the rest of the pack. It is exceedingly difficult to stand back and take a critical view of your work, but it’s an important skill to learn.
Can’t decide whether your photo separates itself from the rest of the pack ? No worries: ask a photographer that’s better than you for their candid feedback. I do it all the time and while it can hurt my underbelly a bit I always find it hugely valuable.
This post has two “tulip shots” in it. I throw the comments open to everyone… any of them separate themselves from the pack?